
Pre-Setup Requirements
GPU
The AI model runs through DirectML on your GPU. Any modern DirectX 12 capable GPU works (NVIDIA 10-series or newer, AMD RX 500 or newer, Intel Arc). Integrated graphics are supported but inference will be slower.First launch JIT-compiles DirectML shader kernels for the YOLO model, which can take 10–20 seconds on cold runs. A centered “AI model loading…” banner stays on screen until the model is ready.
Step by Step Guide
Step 1: Download FlickLabz R6 AI-Aim
Download the latestFlickLabz R6 AI-Aim.exe from your dashboard.
Step 2: Run as Administrator
Right-clickFlickLabz R6 AI-Aim.exe → Run as administrator. Elevation is required so the kernel-level mouse driver can be installed and started.
Step 3: Sign In
Enter your license credentials in the login window. The desktop app will show an 8-character pair code to confirm on the website. Discord and “Forgot Password” are also available there.Step 4: Wait for Driver + Model Load
On first launch the exe will:- Install and start the kernel-level mouse driver.
- Fetch your encrypted AI model from the server.
- Warm up the DirectML inference pipeline (20 iterations, ~10–20 seconds).
Step 5: Set Rainbow Six to Borderless
In Rainbow Six Siege → Options → Display Mode → Borderless. Exclusive Fullscreen is not supported by any external overlay.Step 6: Open the Menu
With both the AI-Aim and the game running, press INS to open the Glacier menu. The game pauses while the menu is open so your clicks do not fire or ADS.Tip: Press INS again to close the menu. The cursor centers on both open and close.
Configuring the Menu
The menu has six tabs on the left rail — Aim, Trigger, RCS, Visuals, Configs, Settings. The top-left overlay always shows the active watermark (brand, weapon, FPS, clock) and your current keybinds.Aim
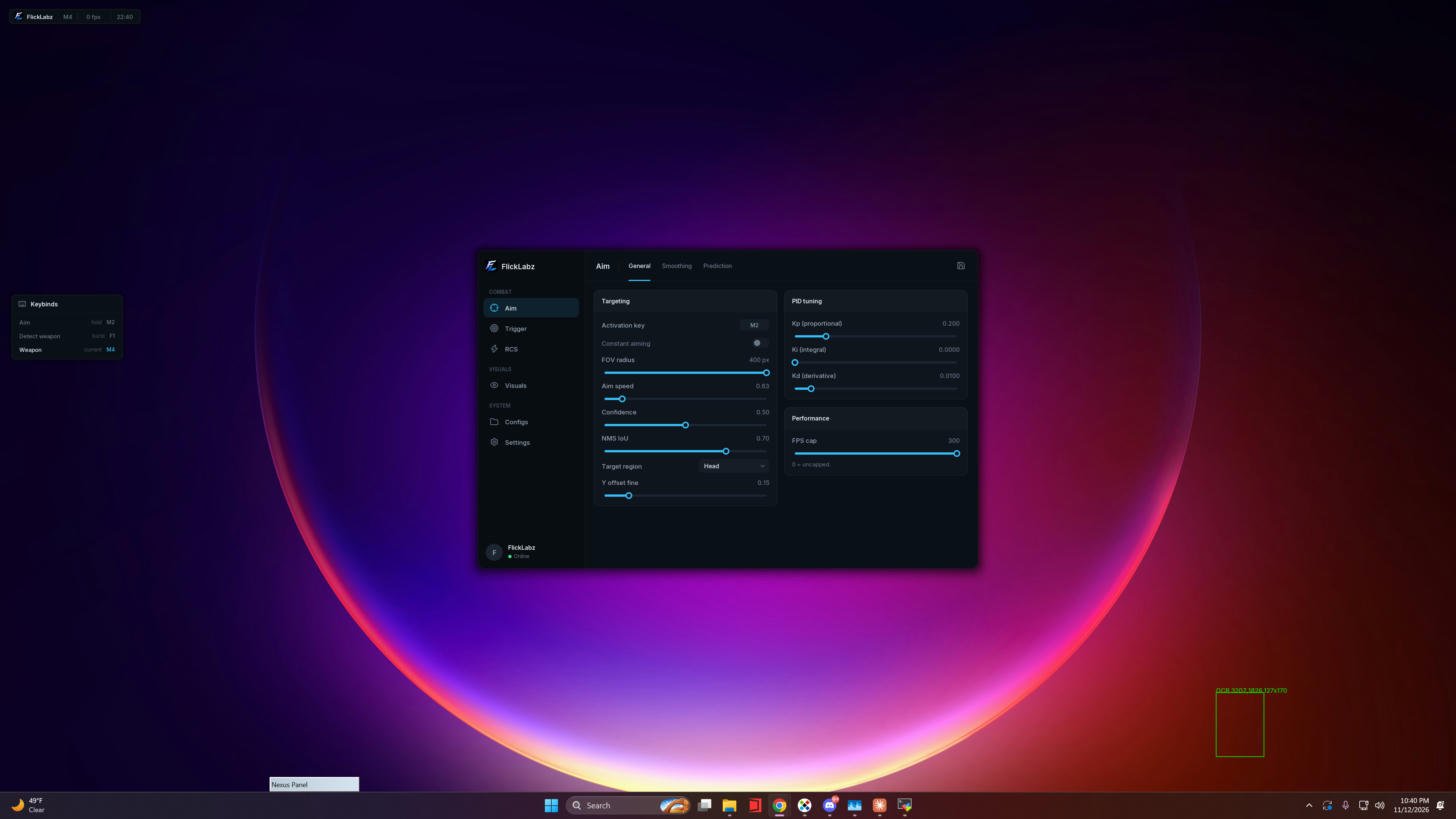
- Activation key — the mouse button or key that activates aim (default M2 / right mouse button).
- Constant aiming — if ON, aim is always engaged (no key required).
- FOV radius — size of the circle around your crosshair in which the AI will acquire a target. Shown in-game if the FOV overlay is enabled.
- Aim speed — how aggressively the pull toward the target is applied.
- Confidence — minimum detection confidence the AI must have before locking.
- NMS IoU — non-max suppression threshold. Leave default unless you know what you are doing.
- Target region — Head / Chest / Lower / Legs.
- Y offset fine — fine Y offset within the chosen target region.
- PID tuning (Kp / Ki / Kd) — proportional, integral and derivative gains for the aim smoothing loop.
- FPS cap — cap the inference loop (0 = uncapped).
Trigger
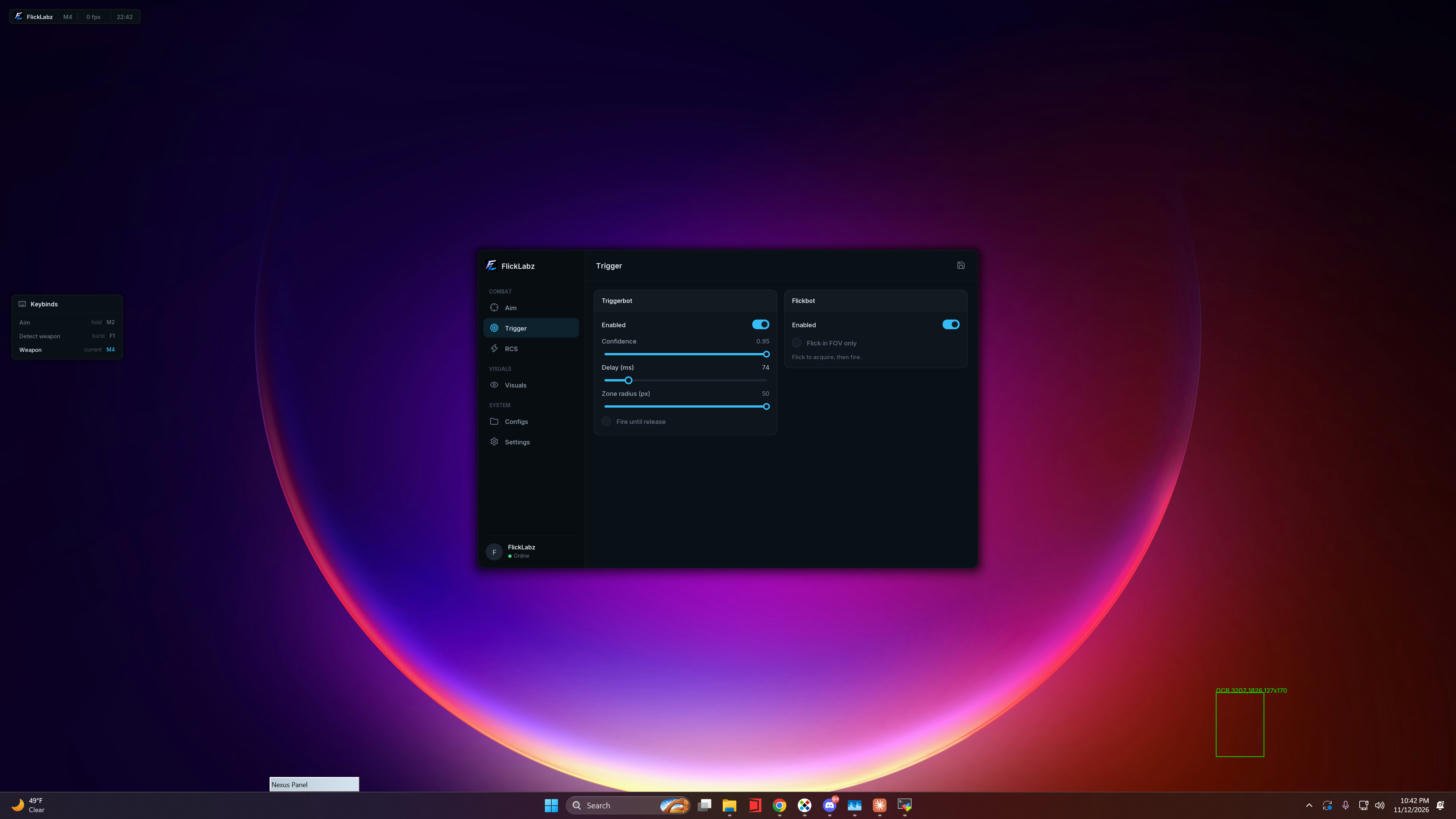
- Triggerbot → Enabled — toggle the auto-fire.
- Confidence — minimum detection confidence that qualifies as “on target”.
- Delay (ms) — delay before fire.
- Zone radius (px) — pixel radius around your crosshair that qualifies as “on target”.
- Fire until release — keep firing while a target stays in the zone.
- Flickbot → Enabled — automatically flick to the target, then fire.
- Flick in FOV only — only flick to targets within your FOV radius.
Triggerbot does not require a key — it fires automatically when a target enters the zone with the required confidence.
RCS — Weapon
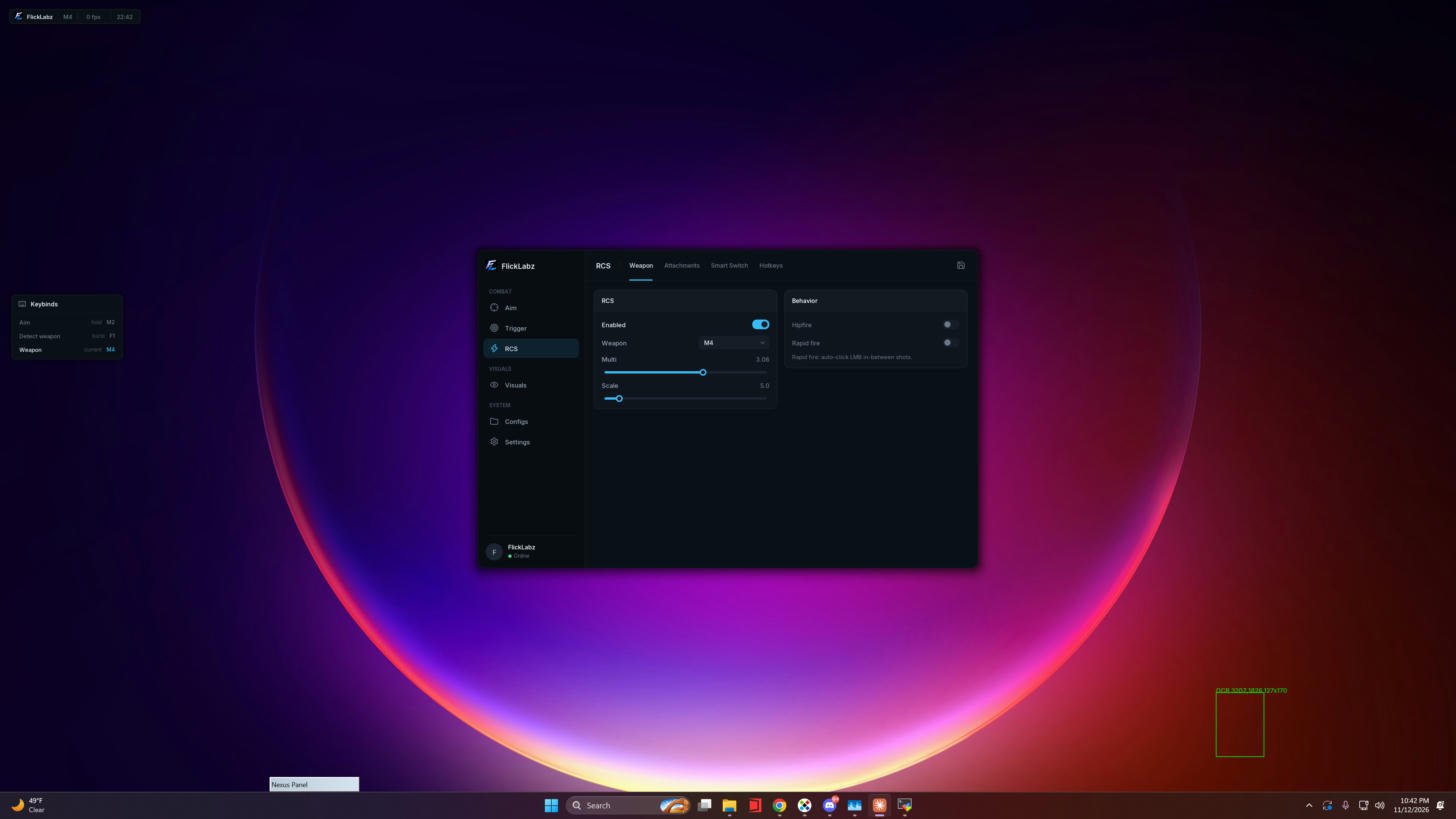
- RCS → Enabled — toggle recoil compensation.
- Weapon — manual weapon pick, or let Smart Switch auto-detect from the HUD.
- Multi — overall pattern multiplier per weapon.
- Scale — per-tick multiplier applied to each sub-move. Auto-set from your in-game INI.
- Behavior → Hipfire — apply RCS without ADS.
- Behavior → Rapid fire — auto-clicks LMB between shots.
RCS — Attachments
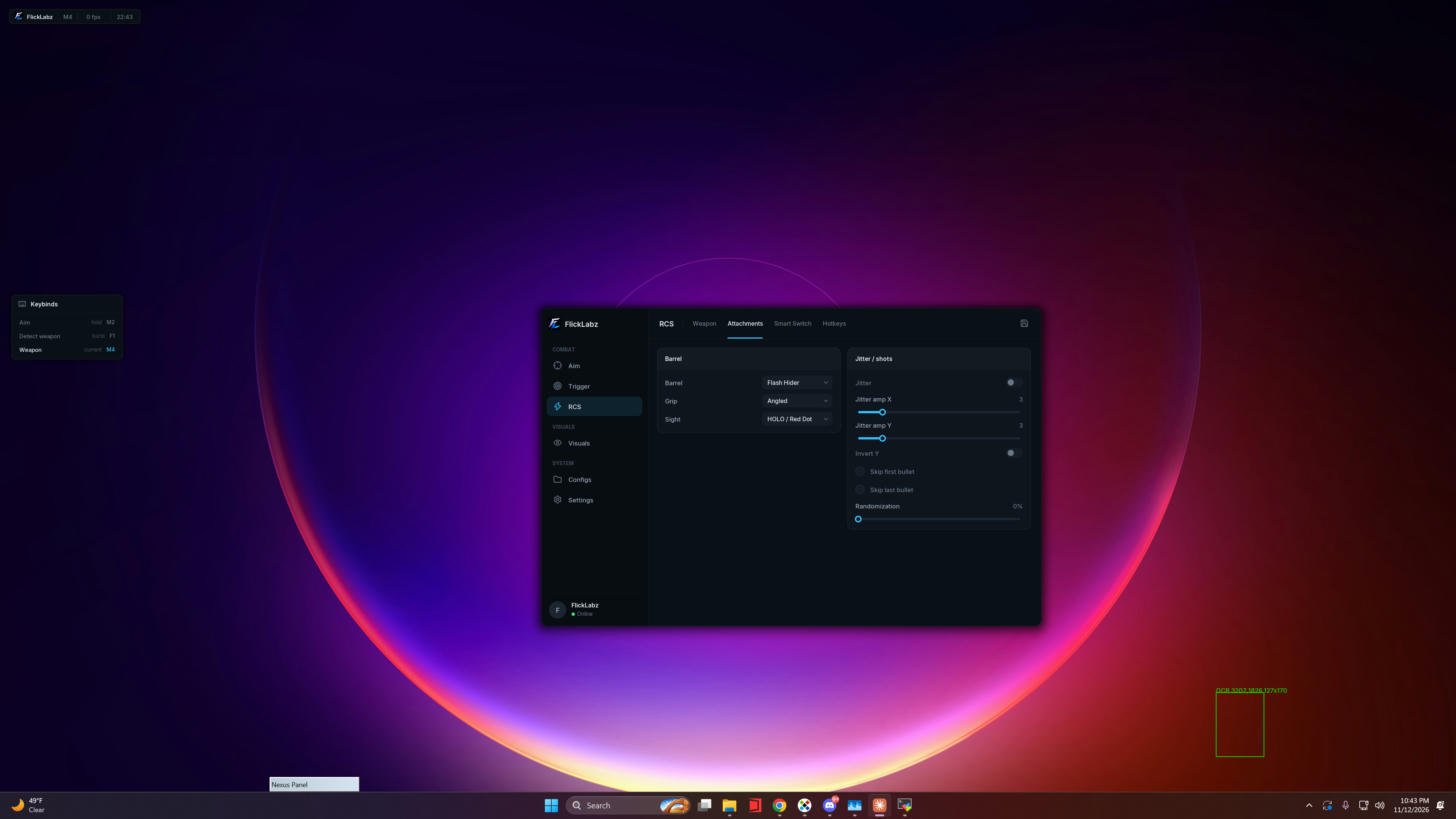
- Barrel — None / Compensator / Flash Hider / Muzzle Brake.
- Grip — Angled / Vertical / Horizontal.
- Sight — HOLO/Red Dot (non-ACOG) / ACOG.
- Jitter / shots — amp X, amp Y, Invert Y, Skip first/last bullet, Randomization.
RCS — Smart Switch (weapon auto-detect)
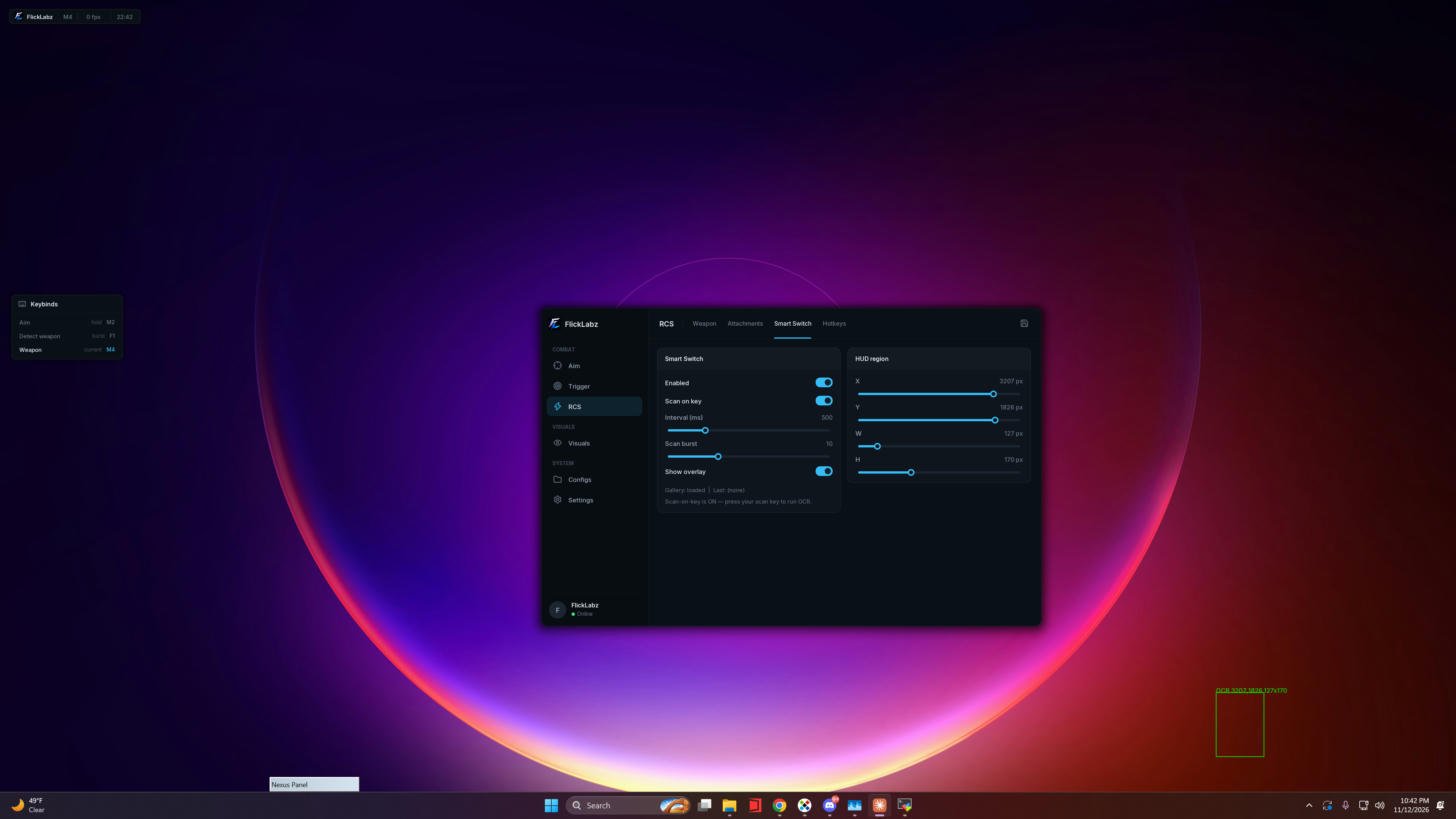
- Enabled — toggle the detector.
- Scan on key — only scan when you press the scan key (default F1), instead of continuous polling. Lighter on CPU and more deterministic.
- Interval (ms) — continuous poll rate (if Scan-on-key is OFF).
- Scan burst — frames to scan per key press (if Scan-on-key is ON).
- Show overlay — draw a green box over the HUD region the AI is reading from.
- HUD region → X / Y / W / H — pixel rectangle of the HUD area to sample. Pre-set per resolution; tweak only if the green box is not exactly over your weapon-switcher HUD.
- Status line at the bottom shows the gallery status and the last OCR result.
Visuals
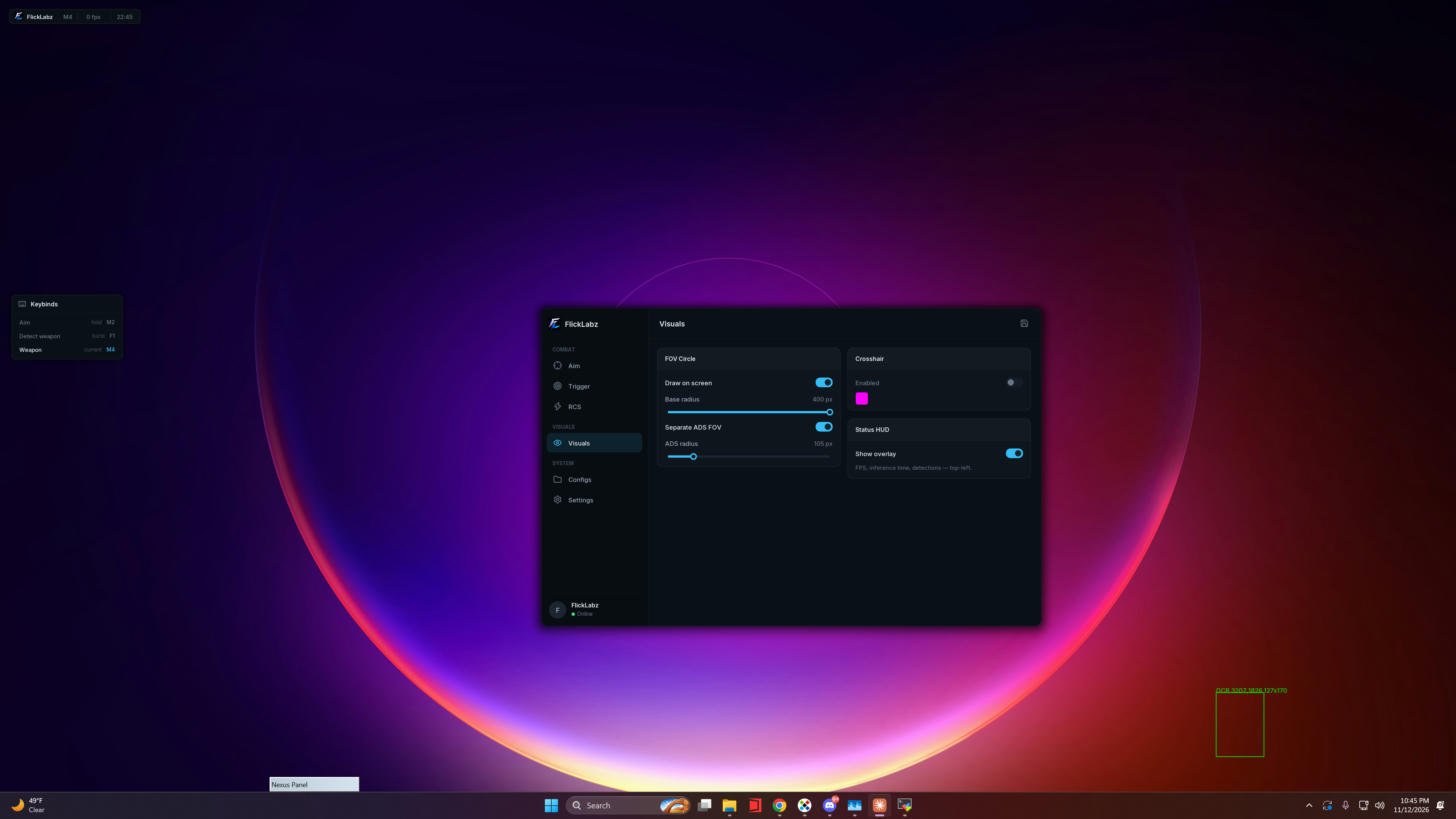
- FOV Circle → Draw on screen — draws the FOV circle in-game.
- Base radius — radius when hip-firing.
- Separate ADS FOV — use a different radius while ADS.
- ADS radius — the FOV radius used when ADS is held.
- Crosshair — enable a custom crosshair + pick its color.
- Status HUD → Show overlay — compact top-left readout of FPS, inference time and detections.
Configs
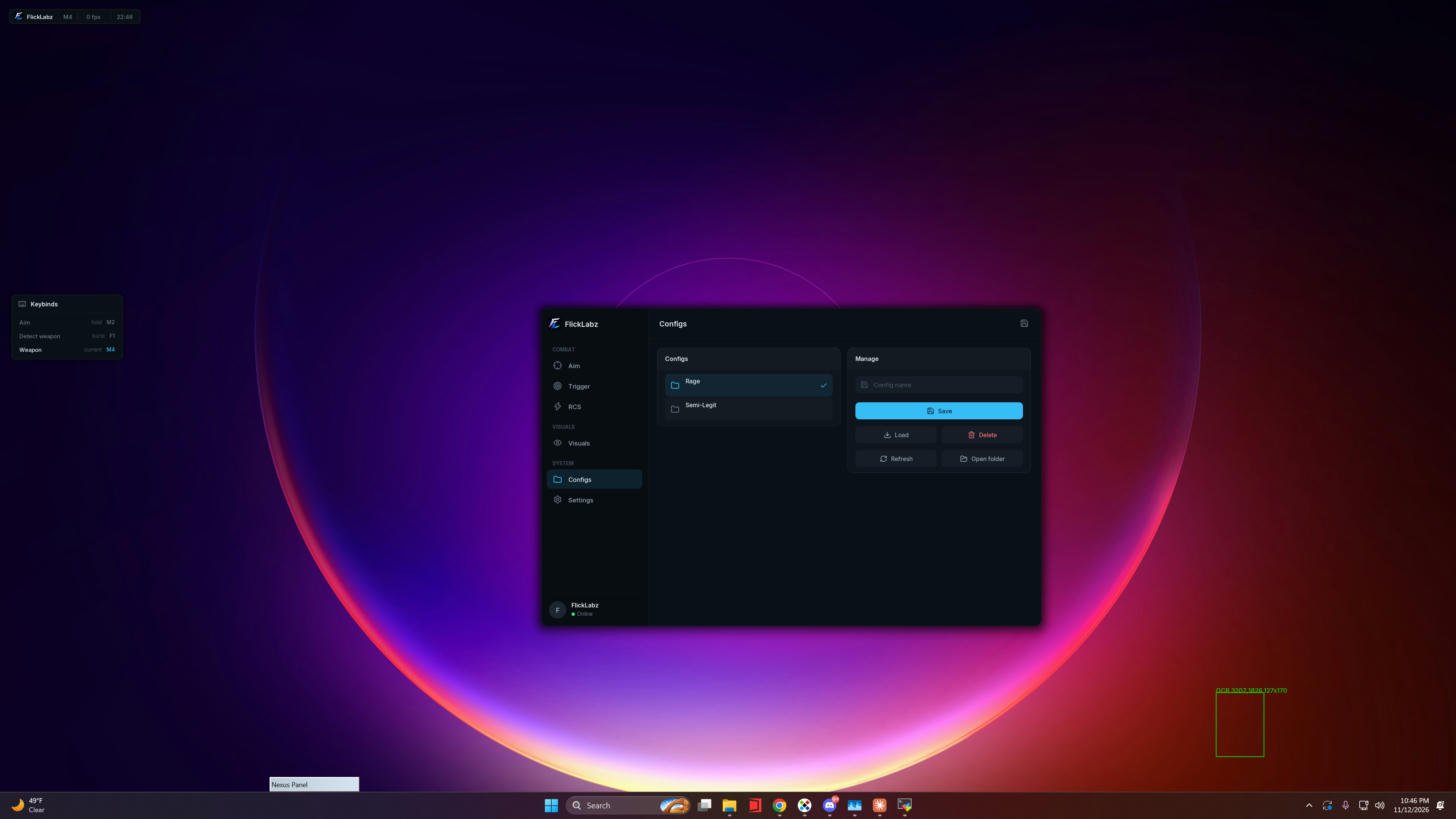
- Left column — your saved configs with a checkmark on the active one.
- Config name — the name for a new save.
- Save — write the current settings to that name.
- Load / Delete / Refresh / Open folder — standard config management.
Settings
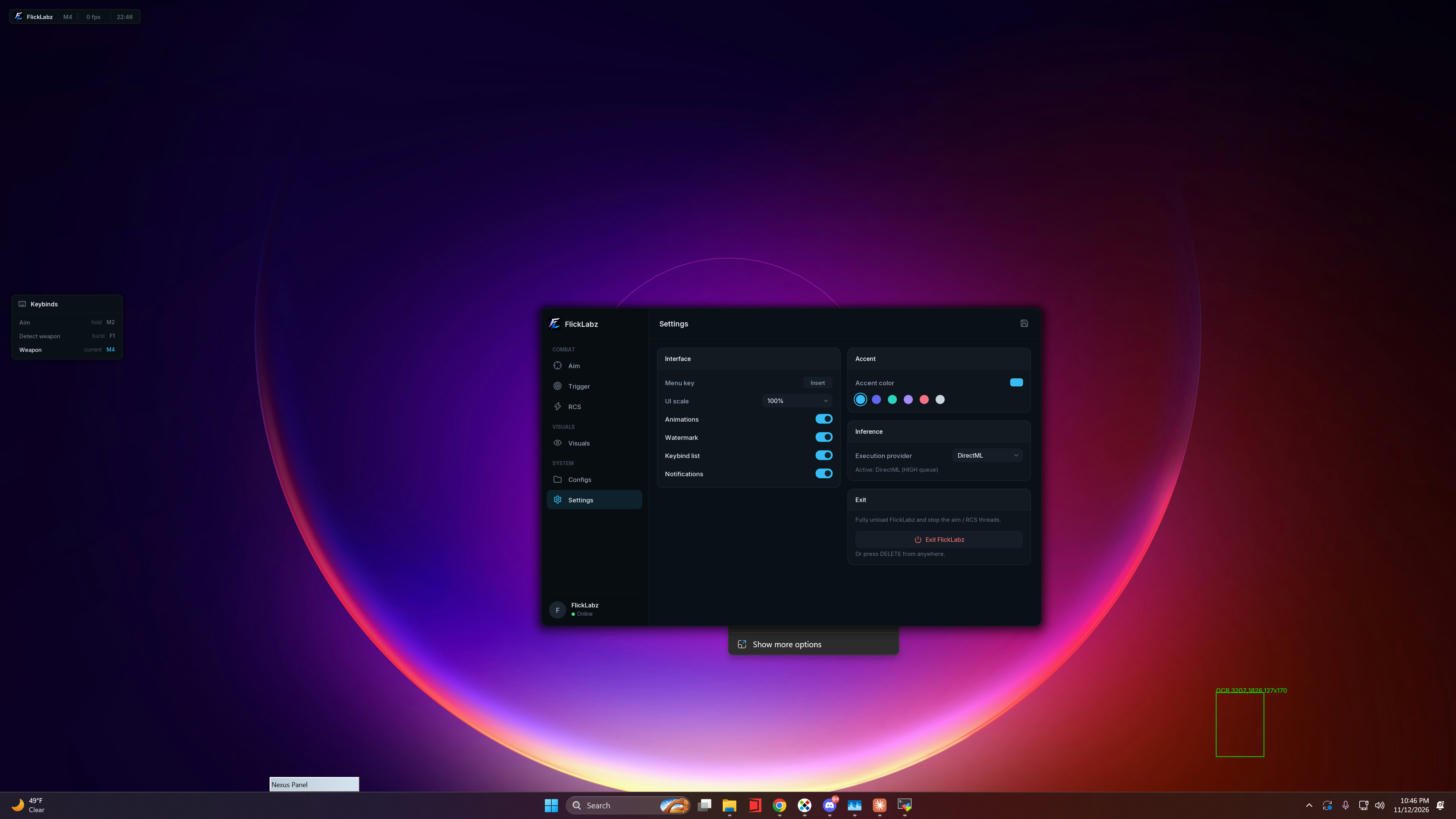
- Menu key — the key that opens and closes the Glacier menu (default Insert).
- UI scale — overall menu scale.
- Animations / Watermark / Keybind list / Notifications — toggle the in-game overlays.
- Accent color — pick the menu accent color.
- Execution provider — which backend runs the AI model (default DirectML).
- Exit FlickLabz — graceful shutdown. You can also press DELETE anywhere.
Hotkeys
Panic Exit
Press Delete at any time to immediately close the software. A dedicated watchdog thread responds instantly even during the model load.Troubleshooting
Aim does not work this launch (but RCS does)
Aim does not work this launch (but RCS does)
The AI model warmup failed on this run (DirectML JIT race). The exe retries the warmup automatically — if it still fails, close and relaunch. The top-of-screen banner stays up until the model is ready.
Mouse cursor keeps showing in gameplay
Mouse cursor keeps showing in gameplay
Make sure Rainbow Six is set to Borderless, not Fullscreen. If the cursor still shows after alt-tab, close the menu once by pressing INS twice — the exe sends R6 a focus-return sequence that re-engages its cursor lock.
Driver Initialization Failed
Driver Initialization Failed
Relaunch — the exe auto-cycles the mouse-driver service to clear a stale channel. If it still fails, restart Windows.
After a long time since last open, PC restart required
After a long time since last open, PC restart required
The driver channel can go stale between runs. The exe auto-recovers without a reboot — just launch it again.
Triggerbot will not fire
Triggerbot will not fire
Open the Trigger tab and lower the Confidence threshold (0.30 works for the current model). Confirm the Zone radius is big enough (default 15 px). Triggerbot is independent of the aim key — it fires automatically when a target enters the zone with sufficient confidence.
Cannot Connect to Server
Cannot Connect to Server
Use a VPN such as WARP and retry launching.